

Create a developer blog or portfolio for free with BitBucket, Netlify and Hexo
When I decided to create my personal portfolio website three years ago, I was faced with the problem of picking one solution among a plethora of different options. After a quick research, I discovered a setup that I deemed ideal for myself and that allowed me to maintain a static blog visible on the Internet for the awesome price of zero. Of course, I am still paying for my domain registration, but I incur no upkeeping costs on top of it. In this article I will explain how to set up a static website similar to mine (in architecture, not necessarily in look&feel). However, before continuing, I shall point out that this specific configuration may not be for everyone, since it is tailored to appeal to developers. As such, it has pros and cons:
Pros:
- Free
- Insanely customizable: code can be freely accessed and modified
- Performant: all content is static, thus there is no need for server-side scripts
- Small: almost entirely textual, no database needed to store content
Cons:
- Limited by the free tier offers of used services
- No content editor in the browser out of the box
- Must be updated manually
Step 1: Setup a static blog engine
In the recent years, static website generators have taken off. They are especially valuable now that sites like github and bitbucket provide static web hosting for free. The advantage of such a framework is that content is static and can thus be served fast and does not need any server-side script running. A simple http server is enough to provide all the assets to any client, thus big providers like those mentioned above can distribute replicas of the same services with negligible customization to a wide audience of developers. They exploit the power of containers to enforce isolation, while sharing a common stack.
The first step is therefore intuitive. You need to choose one among the many available frameworks to build a starting point. Available options are many: just look at staticgen for a list of popular entries. I chose to use hexo because it was the only one written in javascript and I wanted to be able to comfortably and quickly edit its source code without having to meddle with other languages. Of course, new alternatives have risen to popularity in the recent years, like Next and Gatsby, which are both written in javascript. However the resulting artifact for those two is a React application, as opposed to simple html.
Whatever you choose, you will have to follow its documentation in order to set it up. My recomendations are jekyll (for ruby developers), hugo (for go developers) or hexo (for javascript developers). Starting either of those is usually quite simple. For example, quoting the hexo homepage script:
$ npm install hexo-cli -g
$ hexo init blog
$ cd blog
$ npm install
$ hexo server
Step 2: Create a repository
For this article, I am using bitbucket as a reference, but you can do the same on github or any other remote versioning service that supports webhooks. So, create a new repository (ideally a private repository). Then cd into your blog folder and initialize a new local git repository:
$ git init
$ git add *
$ git commit -m "Initial commit"
$ git remote add origin https://username@bitbucket.org/username/reponame.git
$ git push -u origin master
Remember to replace username with your bitbucket username and reponame with the name of the created repository.
Setp 3: Setup Netlify automated deploy
Netlify is an amazing platform for managing deployment of web projects. It also has an awesome free tier support that allows individuals to easily publish small websites. There are limitations, but they are not too steep:
- Bandwidth: max 100GB/month
- Storage: 100GB
Once your account and team are created and configured, you can build a new site from git by linking Netlify with any of the three versioning services they support (github, gitlab and bitbucket). You can take a look at this step by step guide on how to use the creation interface. For hexo, the build command to issue is hexo generate. Following the basic setup guide will enable auto-publishing on your repository.
Tip #1: Reverting breaking changes
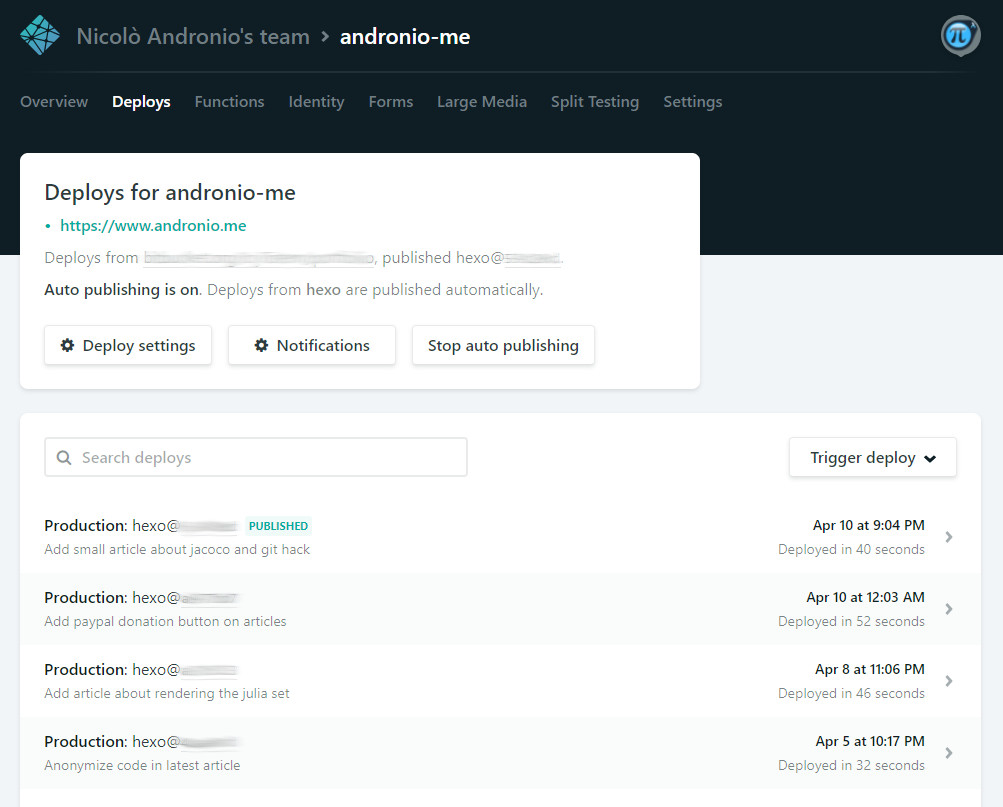
Every time you push a new set of commits from your local branch to the remote master (or another branch of your choosing), Netlify will execute the build command and deploy the most recent version of the website onto the public cloud, making your changes accessible and visible on the Internet within minutes. If anything breaks, you can still go back to your previous functioning deploys and pick an older version to instantly publish while you work on a fix: you simply need to select the desired deploy from the available list and click publish. It is also possible to preview a deploy before publishing it in case auto-publishing is turned off.
Tip #2: Improving maintainability
If you keep a long-running blog, chances are you will not want to continuously update your framework to the latest release every other month. In order to improve repeatability, I suggest you fix your dependency versions (for example in the root package.json if you are using a javascript based framework). On top of that, if you follow the main Netlify toolbar in Settings > Build & Deploy > Build environment variables, you will be able to pin specific versions of node, npm, ruby, go, etc… In my case, for example, I have:
NODE_VERSION=11.10.0
NPM_VERSION=6.7.0
This configuration saved me from breaking changes to hexo after jade had been deprecated in favour of pug. Besides, I was still using an ancient node version on a dated container, which was the reason everything worked fine on my machine but it broke down badly while deploying.
Tip #3: Using a custom domain
By default, your published deployments end up in a subdomain of netlify.com. However, if you purchased your custom domain from any domain registrar, then it is quite easy to make it point to the Netlify deployment. This documentation page should help you.
Tip #4: Using HTTPS
Luckily, from July 2nd 2018, all sites deployed with Netlify will automatically use HTTPS by default. Yay! All certificates are provided by Let’s Encrypt and are automatically renewed every few months.
Step 4: Write, develop and customize
You are now set and ready to go! You can experiment locally by writing drafts, posts and playing with the framework code. A push is enough to make your changes live in a matter of minutes. In my opinion, this is a super comfortable setup that lets developers free to tweak and adapt their blog to their own needs. Oh, as a last reminder, don’t forget to add support for Google Analytics on your website! Most themes already provide embedded scripts for GA, and you only have to provide your personal tracking code.